Getting Started with FlowCentral Platform
The FlowCentral Platform, developed by software developers for software developers, is a high-productivity, high-level and highly-extensible Java application framework for building enterprise grade web-based workflow applications. It is a lightweight full-stack framework developed specifically for enterprise software used for facilitating business operations around process workflows.
You will find FlowCentral architecture and suite of low-code development tools familiar and easy to learn. Its web-based drag-and-drop tools simplify the creation of enterprise software components such as tables, forms, workflows, and reports, effectively reducing development time.
FlowCentral Requirements
A FlowCentral instance comprises a set of Java classes and associated assets bundled within JAR files, operating within a Java Virtual Machine (JVM) environment. All necessary JAR files for running a FlowCentral instance are accessible on Maven Central Repository. Configuration for download and integration into your development environment can be performed through commonly used build tools such as Maven and Gradle.
The minimum Java version required to run a FlowCentral instance is Java 1.8. This or any other higher version will do.
No specific hardware operating system is required. You just have to make sure that the port configured for your FlowCentral instance is open on the operating system’s firewall if you want to access the instance remotely.
We also recommend any modern Java IDE (Eclipse, InteliJ, NetBeans, etc) for development.
Verify and install Java
To check that you have Java 1.8 or higher already installed, open a command-line terminal and enter the following.
java -version
The terminal should output something like:
java version “1.8.0_112”
Java(TM) SE Runtime Environment(build 1.8.0_112-b15)
Java HotSpot(TM) 64-Bit Server VM (build 25.112-b15, mixed mode)-
If a suitable Java version is not installed then you have to install one. You can obtain one from here OpenJDK.
Create your First FlowCentral Project
Creating a FlowCentral Project is made easy by utilizing the online project generator. You basically set the parameters for your project, generate a zip file and import contents of the generated zip file into your IDE as a new project.
- Open a web browser and navigate to http://start.flowcentralplatform.com.
- Configure and set parameters for your FlowCentral project.
- Click Generate & Download.
- Download the resulting ZIP file. The ZIP file is an archive of a FlowCentral project that is configured based on your choices on the Initializer.
- Import the projects from the generated ZIP archive into your preferred IDE.
- Once the FlowCentral projects are imported, go to the executable JAR project and run the runnable class as a Java application.
- Open any modern web browser and enter localhost:8080 at the address bar (Your port number and context may vary if you changed default values when configuring your project on Initializer). You will be presented with a login page. Login with Login ID ‘SYSTEM’ and password ‘system’. You will be asked to change password.
- On successful login, you will be presented FlowCentral application home page of your instance.
FlowCentral Docker Instance Requirements
A FlowCentral instance can be easily set up using a Docker image, allowing users to quickly deploy a pre-configured environment without manual installation. The FlowCentral Docker image includes all the necessary components, application code, runtime libraries, environment variables, and configurations needed for seamless deployment. Using Docker eliminates compatibility issues and ensures a consistent setup across different systems.
To run a FlowCentral instance using Docker, ensure you have the following:
- Docker Desktop (Installed and running)
- A web browser (for accessing your FlowCentral instance)
- Docker Compose file
No specific hardware or operating system requirements is required, as Docker provides an isolated environment for running the instance.
Verify and install Docker
To check that you have docker desktop already installed, open a command-line terminal and enter the following.
The terminal should output something like:
Docker version 27.3.1, build ce12230
If Docker is not installed, you ill see an error message indicating that the command is not recognized. In that case, you will need to install Docker Desktop from the docker official website www.docker.com.
Create Your First FlowCentral Instance
Setting up a FlowCentral instance using Docker is simple and requires just a few steps:
- Download the Docker Compose File ‘docker-compose.yml’ here or create one with contents shown below. Save the Docker Compose file to a known location on your computer.
version: ‘3.8’
services:
postgres:
image: postgres:14
container_name: postgres-db
restart: always
environment:
POSTGRES_DB: myappdb
POSTGRES_USER: myapp
POSTGRES_PASSWORD: myapp123
ports:
– “5438:5432”
volumes:
– postgres_data:/var/lib/postgresql/data
myapp:
image: flowcentraltechnologies/start.flowcentral:latest
container_name: myapp-container
restart: always
depends_on:
– postgres
ports:
– “8080:8080”
environment:
unify-application-datasource-url: jdbc:postgresql://postgres:5432/myappdb
unify-application-datasource-username: myapp
unify-application-datasource-password: myapp123
volumes:
postgres_data:
2. Start Docker and Run the Instance: Open Docker Desktop and ensure it is running. Navigate to the location where the Docker Compose file was saved and run the following command in a terminal or command prompt:
This process downloads the necessary FlowCentral application image container and PostgreSQL database image container from Docker Hub.
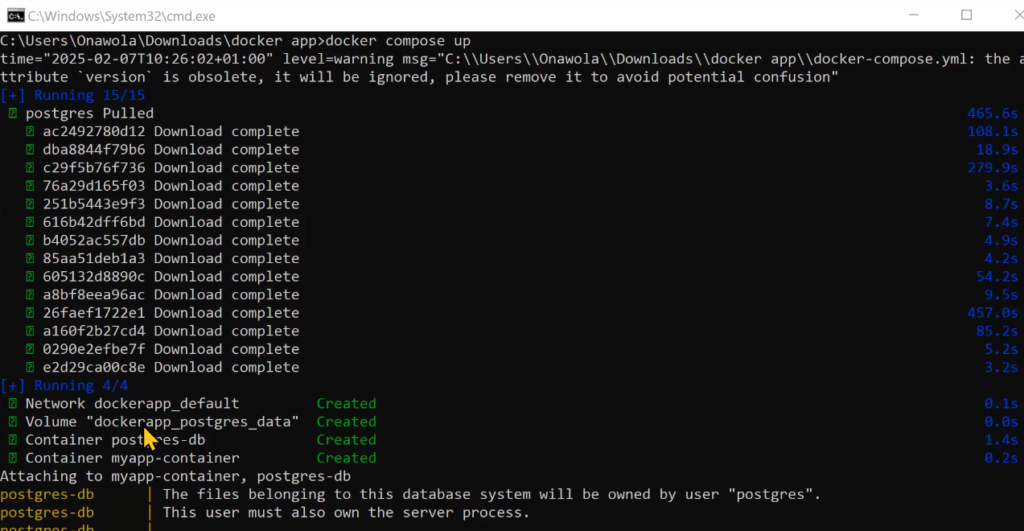
A volume and network are also created to allow both containers to communicate. After pulling all the necessary tools, the FlowCentral instance starts running inside Docker desktop.
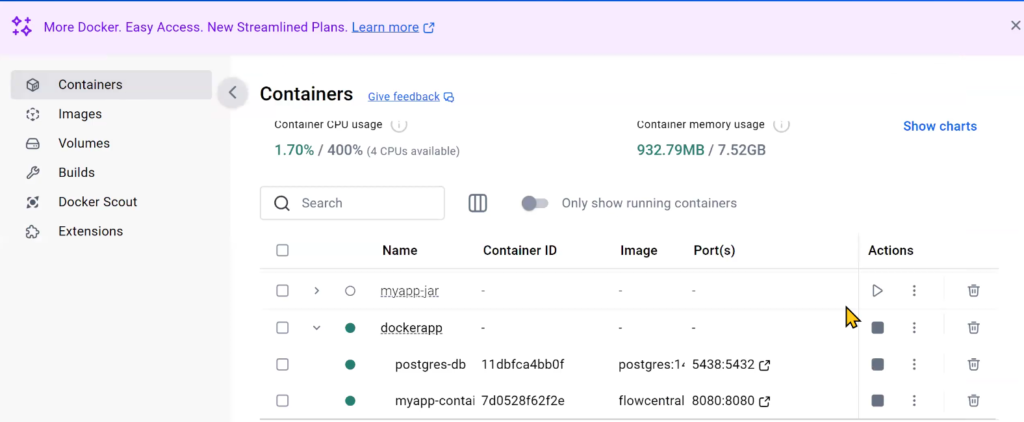
- Check Running Containers on Docker Desktop: Once the instance is running, open Docker Desktop and check the Containers tab. The running FlowCentral instance will be listed with the same name as the folder where the Docker Compose file was saved.
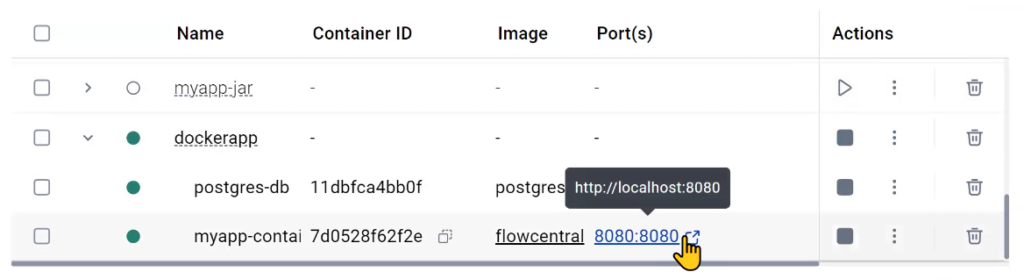
- Access FlowCentral in Your Browser: Once the instance is up, open a web browser and navigate to “https://localhost:8080”. Alternatively, click the highlighted link shown in the image below to open the instance on your browser.
- Login to FlowCentral: You will be presented with a login page. Login with Login ID ‘SYSTEM’ and Password ‘system’. You will be asked to change your password before proceeding.
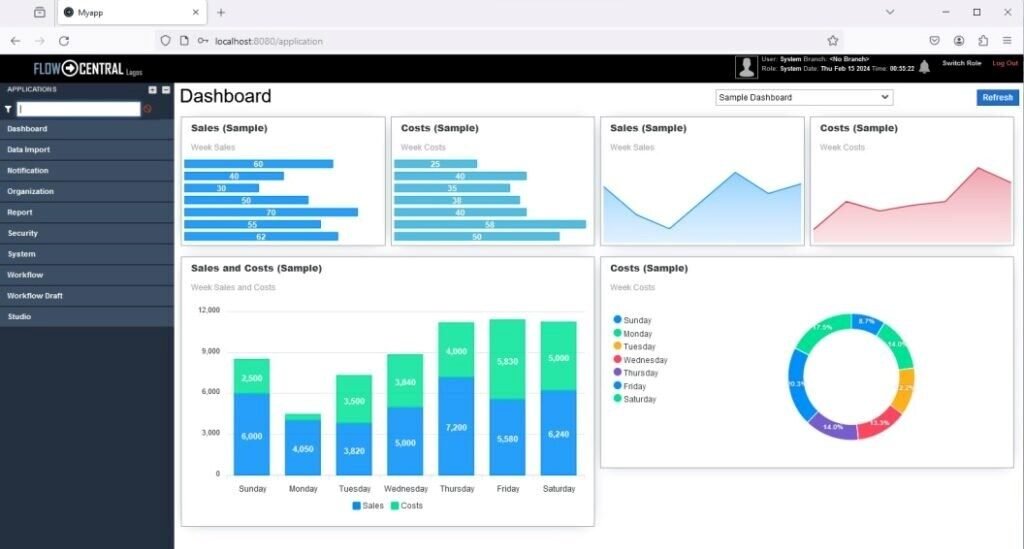
- On successful login, you will be presented with the FlowCentral application home page of your instance